A Comprehensive Guide to CMake Installation on Windows
Related Articles: A Comprehensive Guide to CMake Installation on Windows
Introduction
With great pleasure, we will explore the intriguing topic related to A Comprehensive Guide to CMake Installation on Windows. Let’s weave interesting information and offer fresh perspectives to the readers.
Table of Content
- 1 Related Articles: A Comprehensive Guide to CMake Installation on Windows
- 2 Introduction
- 3 A Comprehensive Guide to CMake Installation on Windows
- 3.1 Understanding CMake’s Role
- 3.2 Advantages of Using CMake on Windows
- 3.3 Installing CMake on Windows
- 3.4 Configuring CMake for Use
- 3.5 Building and Installing Projects with CMake
- 3.6 Frequently Asked Questions (FAQs)
- 3.7 Tips for Using CMake on Windows
- 3.8 Conclusion
- 4 Closure
A Comprehensive Guide to CMake Installation on Windows
CMake, a cross-platform build system, is an essential tool for developers working on projects of varying sizes and complexities. It enables developers to build, test, and package their projects in a consistent manner across diverse operating systems and platforms, including Windows. This guide provides a comprehensive overview of installing and using CMake on Windows, highlighting its key benefits and addressing common queries.
Understanding CMake’s Role
CMake acts as a bridge between source code and platform-specific build systems. It reads a configuration file (CMakeLists.txt) that describes the project’s structure and dependencies. Based on this information, CMake generates platform-specific build files, such as Visual Studio solution files or Makefiles, enabling the compilation and linking of the project.
Advantages of Using CMake on Windows
-
Cross-Platform Compatibility: CMake ensures consistent build processes across Windows, Linux, macOS, and other operating systems, simplifying the development and deployment of projects.
-
Simplified Project Management: CMake streamlines project organization by managing dependencies, build options, and target configurations.
-
Increased Productivity: By automating the build process, CMake frees developers from manual tasks, enabling them to focus on coding and innovation.
-
Enhanced Build Flexibility: CMake provides granular control over build configurations, allowing developers to tailor the build process to specific requirements, such as debug or release builds.
-
Integration with IDEs: CMake seamlessly integrates with popular integrated development environments (IDEs), including Visual Studio, providing a user-friendly interface for building, debugging, and testing projects.
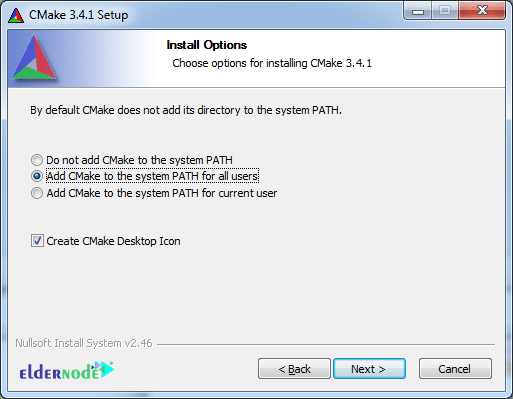
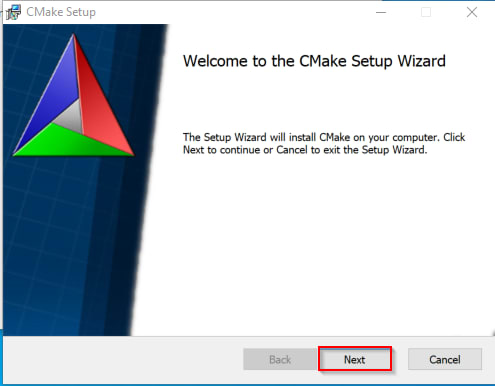
Installing CMake on Windows
-
Download CMake: Visit the official CMake website (https://cmake.org/download/) and download the latest stable release for Windows.
-
Run the Installer: Double-click the downloaded executable file to launch the CMake installer.
-
Choose Installation Options: Select the desired installation directory and components. It is recommended to include the "Add CMake to the system PATH for all users" option for easy access.
-
Complete the Installation: Click "Next" to complete the installation process.
Configuring CMake for Use
Once installed, CMake requires configuration before it can be used to build projects. This involves specifying the source code directory and the build directory.
-
Open CMake GUI: Search for "CMake" in the Windows Start menu and open the CMake GUI application.
-
Set Source Code Directory: Click the "Browse Source" button and select the directory containing the project’s source code files.
-
Set Build Directory: Click the "Browse Build" button and choose a directory for the build files. It is recommended to create a separate directory for build files to avoid cluttering the source code directory.
-
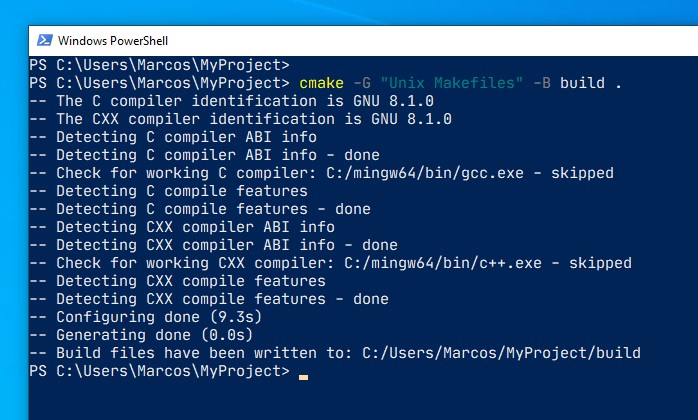
Configure Project: Click the "Configure" button. CMake will scan the project and generate build files based on the chosen generator (e.g., Visual Studio).
-
Resolve Configuration Errors: If any errors occur during configuration, review the output window and address them accordingly. Common errors include missing dependencies or incorrect compiler settings.
-
Generate Build Files: Once the configuration is complete, click the "Generate" button to create the build files.
Building and Installing Projects with CMake
-
Open the Build Directory: Navigate to the build directory created during the CMake configuration step.
-
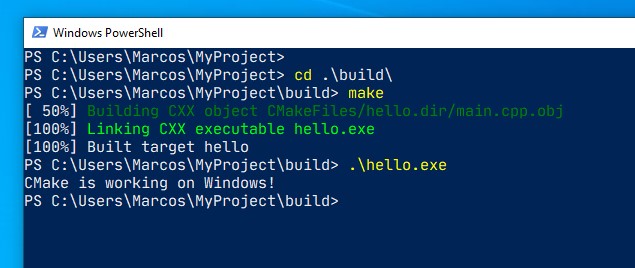
Build the Project: Depending on the chosen generator, you can either open the generated Visual Studio solution file or use a command-line tool like "cmake –build ." to build the project.
-
Install the Project: After successful compilation, use the "cmake –install ." command to install the built project files into the appropriate system directories.
Frequently Asked Questions (FAQs)
Q1: How can I customize the build process with CMake?
A1: CMake offers various options for customizing the build process, including:
-
Build Types: Define different build configurations, such as Debug, Release, and RelWithDebInfo, to control optimization levels and debugging symbols.
-
Compiler Flags: Specify compiler flags to customize the compilation process, such as enabling warnings or disabling specific optimizations.
-
External Dependencies: Manage external libraries and dependencies using CMake’s find_package() command.
Q2: What are the benefits of using CMake for cross-platform development?
A2: CMake’s cross-platform nature simplifies the development and deployment of projects across diverse platforms. Developers can use the same CMakeLists.txt file to build their project on Windows, Linux, macOS, and other operating systems, ensuring consistency and reducing the effort required for platform-specific adaptations.
Q3: How can I debug my CMake project on Windows?
A3: Debugging CMake projects on Windows typically involves using the integrated debugger within Visual Studio. After configuring and generating build files, open the generated Visual Studio solution file and utilize the debugging tools provided by the IDE.
Q4: How do I handle dependencies and external libraries in my CMake project?
A4: CMake provides mechanisms for managing dependencies and external libraries:
-
find_package(): This command searches for specific libraries and packages on the system.
-
ExternalProject: This module allows you to include external projects as subprojects within your CMake project.
-
FetchContent: This module enables you to download and manage external dependencies directly from source control repositories.
Tips for Using CMake on Windows
-
Maintain a Clean Build Directory: Regularly clean the build directory to ensure a fresh build and avoid potential issues caused by outdated files.
-
Use CMake’s Documentation: Refer to the official CMake documentation for detailed information on commands, options, and advanced features.
-
Utilize CMake’s Testing Framework: CMake includes a built-in testing framework that allows you to write and execute unit tests as part of the build process.
-
Explore CMake Modules: CMake provides a wide range of modules that simplify common tasks, such as handling external libraries, generating documentation, and creating installers.
Conclusion
CMake is a powerful and versatile build system that significantly simplifies the development process on Windows and other platforms. Its cross-platform compatibility, streamlined project management, and enhanced build flexibility make it an essential tool for developers of all experience levels. By understanding the fundamental concepts of CMake installation and configuration, developers can leverage its capabilities to streamline their workflows and achieve greater productivity. As projects grow in complexity and require more sophisticated build processes, CMake’s features become increasingly valuable, ensuring a smooth and efficient development experience.


Closure
Thus, we hope this article has provided valuable insights into A Comprehensive Guide to CMake Installation on Windows. We hope you find this article informative and beneficial. See you in our next article!