CMake: Streamlining Cross-Platform Development on Windows
Related Articles: CMake: Streamlining Cross-Platform Development on Windows
Introduction
With great pleasure, we will explore the intriguing topic related to CMake: Streamlining Cross-Platform Development on Windows. Let’s weave interesting information and offer fresh perspectives to the readers.
Table of Content
- 1 Related Articles: CMake: Streamlining Cross-Platform Development on Windows
- 2 Introduction
- 3 CMake: Streamlining Cross-Platform Development on Windows
- 3.1 Understanding CMake’s Role
- 3.2 Advantages of Using CMake on Windows
- 3.3 Setting Up CMake on Windows
- 3.4 CMakeLists.txt: The Heart of CMake
- 3.5 Building and Running Your Project
- 3.6 CMake for Windows: Advanced Concepts
- 3.7 FAQs about CMake on Windows
- 3.8 Tips for Using CMake on Windows
- 3.9 Conclusion
- 4 Closure
CMake: Streamlining Cross-Platform Development on Windows

CMake, a powerful open-source build system, has revolutionized the process of building and managing software projects, particularly for cross-platform development. While often associated with Linux and macOS, CMake’s capabilities extend seamlessly to Windows, offering a robust and efficient solution for developers. This article delves into the intricacies of using CMake on Windows, exploring its functionalities, benefits, and practical applications.
Understanding CMake’s Role
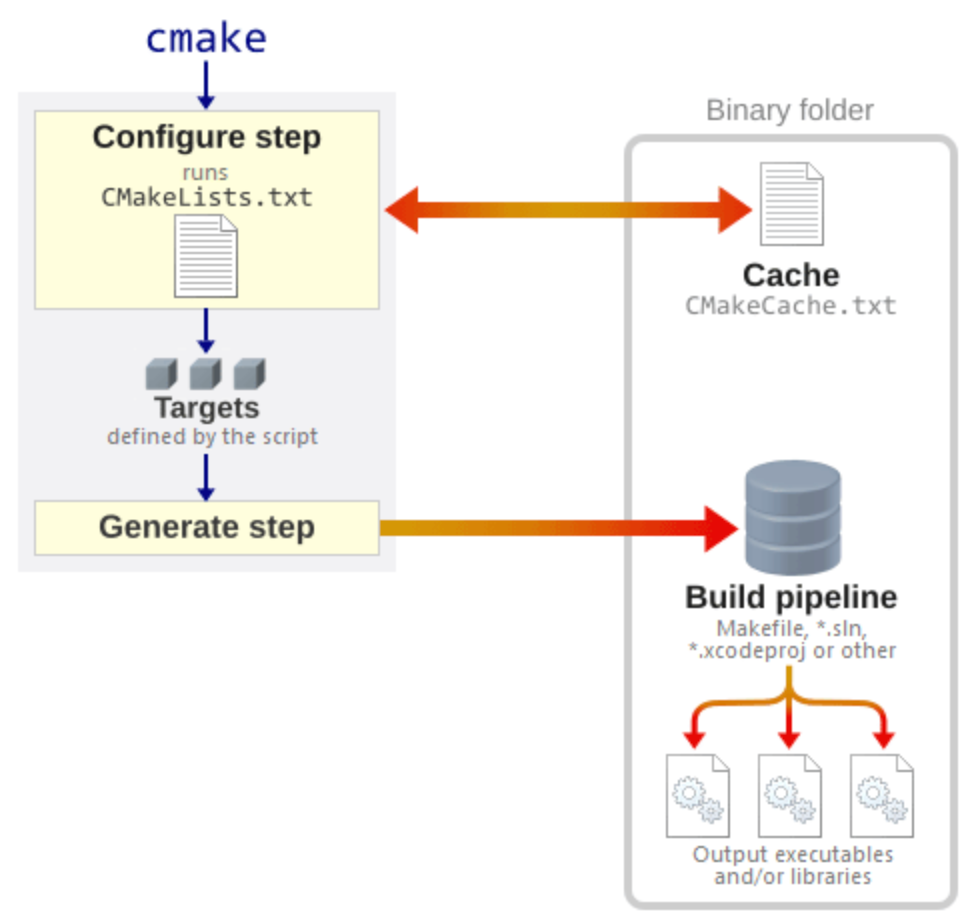
CMake, an acronym for "Cross Platform Make," stands as a meta-build system, acting as an intermediary between developers and the underlying build systems of specific platforms. It reads a platform-independent configuration file, known as a CMakeLists.txt file, and generates platform-specific build files, such as Visual Studio solutions (.sln) or Makefiles, enabling the compilation and linking of projects across various operating systems.
Advantages of Using CMake on Windows
1. Cross-Platform Compatibility: CMake’s primary strength lies in its ability to generate build files for diverse platforms, including Windows, Linux, macOS, and even embedded systems. This eliminates the need for platform-specific build scripts, simplifying project management and facilitating seamless transitions between development environments.
2. Simplified Build Process: CMake automates the build process, handling complex tasks like dependency management, compilation, linking, and installation. This streamlines the development workflow, freeing developers from tedious manual configurations and allowing them to focus on code development.
3. Enhanced Project Organization: CMake promotes a structured project organization by defining build targets, dependencies, and build options within the CMakeLists.txt file. This fosters code maintainability, promotes collaboration among developers, and facilitates easy understanding of project structure.
4. Flexibility and Customization: CMake offers extensive flexibility through its comprehensive set of commands and variables, allowing developers to customize the build process according to specific project requirements. This includes options for configuring compiler flags, defining build types (e.g., debug, release), and managing external libraries.
5. Integration with IDEs: CMake seamlessly integrates with popular integrated development environments (IDEs) like Visual Studio, CLion, and Eclipse, providing a user-friendly interface for project management, build configuration, and debugging.
Setting Up CMake on Windows
- Download and Install CMake: Download the appropriate CMake installer from the official CMake website (https://cmake.org/). Choose the "Win64-x64 Installer" option for Windows.
- Run the Installer: Run the downloaded installer and follow the on-screen instructions. Ensure that you add CMake to your system’s PATH environment variable for convenient access from the command line.
- Configure CMake: Open CMake GUI, select the source directory containing your CMakeLists.txt file, and specify the build directory where you want to generate build files.
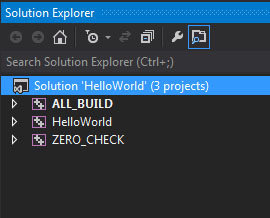
- Generate Build Files: Click the "Configure" button. CMake will scan your project and prompt you to select a generator (e.g., "Visual Studio 17 2022"). Click "Generate" to create the build files.
- Open the Generated Project: Navigate to the build directory and open the generated solution file (e.g., *.sln) in your IDE.
CMakeLists.txt: The Heart of CMake
The CMakeLists.txt file serves as the blueprint for your project, defining its structure, dependencies, and build options. It utilizes a simple, human-readable syntax, allowing developers to specify build instructions using a set of commands and variables.
Essential CMake Commands:
-
project(): Declares the project name and version. -
add_executable(): Defines an executable target. -
add_library(): Defines a library target. -
target_link_libraries(): Links a target to other libraries. -
include_directories(): Adds directories to the search path for header files. -
find_package(): Searches for external libraries and packages. -
install(): Defines installation rules for the project.
Example CMakeLists.txt:
# Project definition
project(MyProject VERSION 1.0.0)

# Add executable target
add_executable(my_program main.cpp utils.cpp)

# Link executable to external library
find_package(Boost REQUIRED)
target_link_libraries(my_program Boost::system Boost::filesystem)

# Install target
install(TARGETS my_program DESTINATION bin)
Building and Running Your Project
Once the build files are generated, you can build and run your project within your IDE or from the command line.
Building from the IDE:
- Open the generated solution file in your IDE.
- Select the build configuration (e.g., Debug or Release).
- Build the project using the IDE’s build tools.
Building from the Command Line:
- Open a command prompt or terminal window.
- Navigate to the build directory.
- Run the build command specific to your generator (e.g.,
cmake --build .).
CMake for Windows: Advanced Concepts
1. External Libraries: CMake simplifies the integration of external libraries by providing the find_package() command, which searches for pre-installed libraries or downloads them from online repositories.
2. Build Types: CMake allows you to define different build types, such as Debug and Release, enabling you to control compiler optimization levels, debugging symbols, and other settings.
3. Custom Build Systems: CMake supports custom build systems through the add_custom_command() and execute_process() commands, allowing developers to execute arbitrary commands during the build process.
4. Testing with CMake: CMake offers support for unit testing through the enable_testing() command, providing a framework for running tests and generating test reports.
5. CPack: Packaging Your Project: CMake’s CPack module facilitates the creation of installable packages for your project, supporting various package formats like ZIP, RPM, and DEB.
FAQs about CMake on Windows
1. What is the difference between CMake and Visual Studio?
CMake is a build system that generates build files, while Visual Studio is an IDE that provides tools for editing, compiling, and debugging code. CMake can be used to generate Visual Studio solutions, allowing projects to be built within Visual Studio.
2. Can I use CMake to build GUI applications on Windows?
Yes, CMake supports building GUI applications using various GUI frameworks, including Qt, wxWidgets, and Win32.
3. How do I debug my project using CMake?
CMake supports debugging by generating build files with debugging symbols. You can then use your IDE’s debugging tools to step through your code and inspect variables.
4. What are some common CMake errors?
Common errors include missing libraries, incorrect paths, and invalid CMake commands. Consult the CMake documentation and error messages for troubleshooting.
5. Can I use CMake with other build systems on Windows?
Yes, CMake can be used alongside other build systems like Make, Ninja, and MSBuild.
Tips for Using CMake on Windows
- Use a consistent project structure: Organize your project files logically for better maintainability.
- Document your CMakeLists.txt file: Add comments to explain the purpose of each command.
- Use variables to manage paths and settings: This improves code readability and simplifies changes.
-
Leverage CMake’s built-in features: Utilize commands like
find_package(),target_link_libraries(), andinstall()to streamline your build process. - Test your project thoroughly: Use CMake’s testing features to ensure the correctness of your code.
Conclusion
CMake empowers developers to build and manage complex projects on Windows with ease. Its cross-platform compatibility, simplified build process, and comprehensive features make it an invaluable tool for modern software development. By mastering CMake’s fundamentals, developers can streamline their workflows, improve project organization, and build high-quality software across multiple platforms.


Closure
Thus, we hope this article has provided valuable insights into CMake: Streamlining Cross-Platform Development on Windows. We thank you for taking the time to read this article. See you in our next article!