The Art of Contouring: Shaping and Defining Features with Makeup
Related Articles: The Art of Contouring: Shaping and Defining Features with Makeup
Introduction
With great pleasure, we will explore the intriguing topic related to The Art of Contouring: Shaping and Defining Features with Makeup. Let’s weave interesting information and offer fresh perspectives to the readers.
Table of Content
- 1 Related Articles: The Art of Contouring: Shaping and Defining Features with Makeup
- 2 Introduction
- 3 The Art of Contouring: Shaping and Defining Features with Makeup
- 3.1 Understanding the Principles of Contouring
- 3.2 The Benefits of Contouring
- 3.3 Contouring Techniques: A Step-by-Step Guide
- 3.4 Common Contouring Mistakes and Solutions
- 3.5 FAQs about Contouring
- 3.6 Tips for Effective Contouring
- 3.7 Conclusion
- 4 Closure
The Art of Contouring: Shaping and Defining Features with Makeup
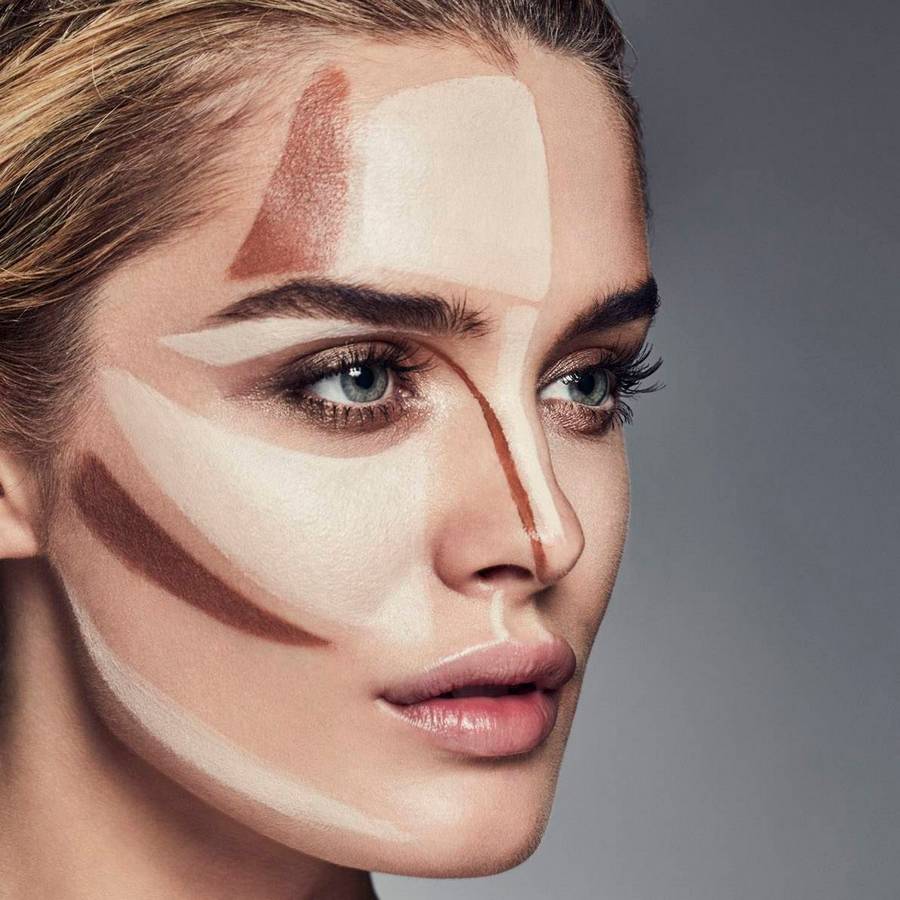
Contouring, a fundamental technique in the realm of makeup artistry, involves manipulating light and shadow to sculpt and define facial features. By strategically applying darker and lighter shades of makeup, contouring creates the illusion of depth and dimension, enhancing natural contours and achieving a more sculpted appearance.
Understanding the Principles of Contouring
The foundation of contouring lies in the interplay of light and shadow. Light, reflecting off surfaces, creates a sense of prominence and protrusion. Conversely, shadows, cast by light, recede, making areas appear smaller or further back. This natural phenomenon is harnessed in contouring to subtly alter the perception of facial structure.
Key Principles of Contouring:
- Light Reflects: Lighter shades, typically cream or powder formulas, are used to highlight areas that should appear prominent, such as the brow bone, cheekbones, and cupid’s bow.
- Shadow Recedes: Darker shades, often in matte formulations, are applied to areas intended to appear recessed, such as the hollows of the cheeks, jawline, and sides of the nose.
- Blending is Paramount: The success of contouring hinges on seamless blending. Sharp lines or abrupt transitions between shades can appear artificial and detract from the natural-looking result.
The Benefits of Contouring
Beyond enhancing features, contouring offers a range of benefits:
- Sculpted Features: By creating the illusion of depth and definition, contouring can enhance cheekbones, define the jawline, and refine the nose.
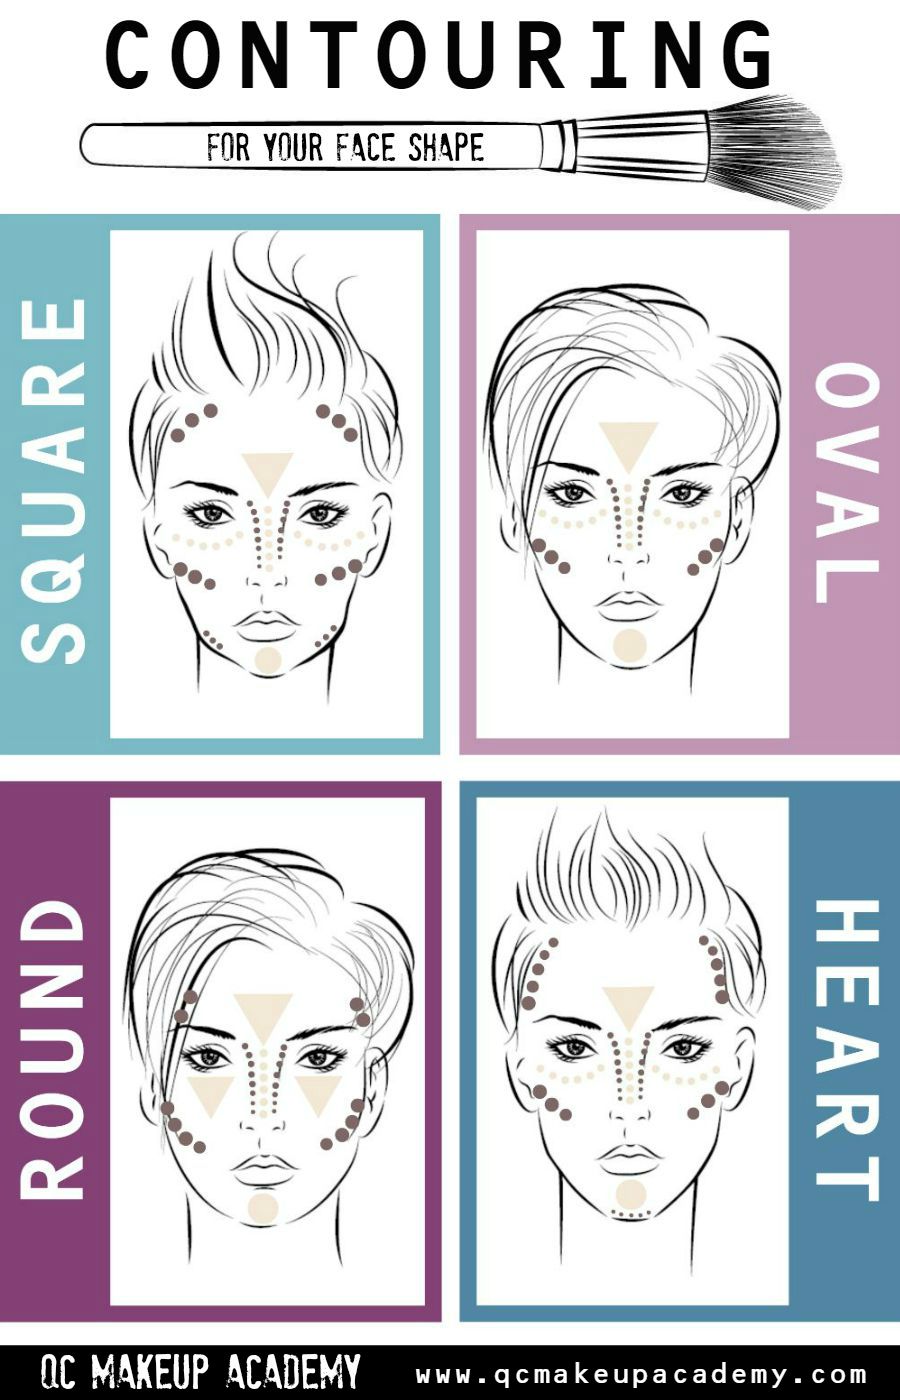
- Balanced Proportions: Contouring can help balance facial features, making a wide forehead appear narrower or a round face appear more defined.
- Customizable Results: Contouring can be adapted to suit individual preferences and achieve a range of looks, from subtle enhancement to dramatic transformation.
- Long-Lasting Wear: When properly applied and blended, contouring can last throughout the day, offering a polished and sculpted appearance.
Contouring Techniques: A Step-by-Step Guide
1. Preparation:
- Cleanse and Moisturize: Begin with a clean and well-moisturized face to create a smooth canvas for makeup application.
- Primer Application: Apply a primer to help makeup adhere and last longer, ensuring a smooth and even finish.
- Foundation and Concealer: Apply foundation and concealer as usual, creating an even base for contouring.
2. Contouring:
- Cheeks: Use a contour shade slightly darker than your natural skin tone. Apply it to the hollows of your cheeks, starting from the outer corner of your eye and blending upwards towards your temples.
- Nose: Apply contour shade down the sides of your nose, blending gently to create a slimmer appearance.
- Jawline: Apply contour shade along your jawline, blending downwards to define the shape.
- Forehead: If desired, apply contour shade along the hairline to create a more defined forehead.
3. Highlighting:
- Cheekbones: Apply a highlight shade to the tops of your cheekbones, blending upwards towards your temples.
- Brow Bone: Apply highlight shade to the brow bone, creating a lift and brightening effect.
- Cupid’s Bow: Apply highlight shade to the center of your upper lip, enhancing the shape.
- Center of Forehead: Apply highlight shade to the center of your forehead, creating a luminous effect.
4. Blending:
- Brushes and Sponges: Use a blending brush or sponge to seamlessly blend the contour and highlight shades, ensuring a natural-looking transition.
- Circular Motions: Use circular motions to blend the shades, working outwards from the areas where the product was applied.
- Pay Attention to Edges: Ensure that the edges of the contour and highlight shades are well-blended, avoiding any harsh lines or abrupt transitions.
5. Setting:
- Powder Application: Apply a setting powder over the contour and highlight shades to lock them in place and prevent creasing or fading.
Common Contouring Mistakes and Solutions
1. Over-Contouring: Applying too much contour shade can create a muddy or unnatural appearance.
Solution: Use a light hand when applying contour shade and focus on blending seamlessly.
2. Harsh Lines: Sharp lines or abrupt transitions between shades can appear artificial and detract from the natural-looking result.
Solution: Use a blending brush or sponge to soften the edges of the contour and highlight shades, creating a smooth transition.
3. Incorrect Shade Selection: Using a shade that is too dark or too light for your skin tone can lead to an unnatural appearance.
Solution: Choose a contour shade that is one to two shades darker than your natural skin tone and a highlight shade that is one to two shades lighter.
4. Not Blending Enough: Insufficient blending can result in a patchy or unnatural appearance.
Solution: Spend adequate time blending the contour and highlight shades, ensuring a seamless transition.
5. Using the Wrong Tools: Using the wrong brushes or sponges can make it difficult to blend contour and highlight shades effectively.
Solution: Invest in high-quality blending brushes or sponges designed for contouring and highlighting.
FAQs about Contouring
Q: What type of brushes are best for contouring?
A: Angled brushes are ideal for applying contour shade to the hollows of the cheeks, jawline, and sides of the nose. Flat brushes are suitable for applying highlight shade to the cheekbones, brow bone, and cupid’s bow. Blending brushes, with their soft and fluffy bristles, are essential for seamlessly blending the shades.
Q: What type of products should I use for contouring?
A: Cream contour sticks are easy to apply and blend, making them suitable for beginners. Powder contour palettes offer versatility and allow for precise application. Liquid contour drops can be mixed with foundation for a subtle contour effect.
Q: How do I choose the right contour and highlight shades for my skin tone?
A: For fair skin tones, choose cool-toned contour shades and warm-toned highlight shades. For medium skin tones, opt for neutral-toned contour shades and warm-toned highlight shades. For dark skin tones, choose warm-toned contour shades and neutral-toned highlight shades.
Q: Can I contour without using makeup?
A: Yes, you can create a contouring effect using bronzer, blush, and highlighter. Bronzer can be used to create a natural contour along the cheekbones, jawline, and sides of the nose. Blush can be applied to the apples of the cheeks to add warmth and dimension. Highlighter can be used to brighten the cheekbones, brow bone, and cupid’s bow.
Q: How can I make my contour last longer?
A: Apply a setting spray after applying contour and highlight shades to lock them in place and prevent fading or creasing.
Q: Is contouring suitable for all skin types?
A: Contouring can be adapted for all skin types. For oily skin, use matte contour and highlight shades and set with a powder to prevent shine. For dry skin, use cream contour and highlight shades and apply a hydrating setting spray.
Tips for Effective Contouring
- Start with a Light Hand: Begin with a small amount of product and gradually build up the intensity as needed.
- Blend Seamlessly: Spend adequate time blending the contour and highlight shades, ensuring a natural-looking transition.
- Consider Your Face Shape: Contouring can be used to enhance or minimize specific facial features.
- Experiment with Different Techniques: There are many different contouring techniques, so experiment to find what works best for you.
- Practice Makes Perfect: Contouring takes practice to master. Don’t be discouraged if your first attempts aren’t perfect.
Conclusion
Contouring, a versatile and transformative makeup technique, empowers individuals to sculpt and define their features, achieving a more balanced and sculpted appearance. By understanding the principles of light and shadow and mastering the art of blending, contouring can enhance natural beauty and create a range of looks, from subtle enhancement to dramatic transformation. Whether you’re a makeup novice or a seasoned pro, embracing the art of contouring opens a world of possibilities for enhancing your unique features and achieving a more confident and radiant look.


Closure
Thus, we hope this article has provided valuable insights into The Art of Contouring: Shaping and Defining Features with Makeup. We thank you for taking the time to read this article. See you in our next article!